You guys!!! Here is the big reveal of that project I’ve been hinting at.
I redid my kitchen!!
I’ve been wanting to do this since I bought the house 5 years ago, and finally this spring I decided to just bite the bullet and DO it already.
I call it a kitchen “redo” because it’s not big enough for a renovation, but it’s bigger than just redecorating. My kitchen was old and dingy and dark, and I wanted it to look new, clean, and bright. I also wanted to make changes that would be a good investment for resale (basically, keep things neutral, nothing too wacky). I don’t have any current plans to sell my house ever in my life, but I know that it may happen someday, so I always consider resale whenever I make a change.
Here is what my kitchen looked like before:
 Old, dingy, ugly, and brown brown brown!
 Isn’t that floor gorgeous? The best part about it was that it was stick n’ peel tiles, and the edges of each tile were sticky from the glue, so they would just cling to every speck of dust/strand of hair/food crumb. Impossible to clean. It was greeeaaat.
Also, bonus! I was hoping there would be hardwood underneath the vinyl tiles, but noooope, just even UGLIER vinyl tiles:
 So! My first step in the process was to decide what I wanted.
As inspiration, I pinned about a billion pins on Pinterest of kitchens that look like this:
 So, basically, I was planning on doing white upper cabinets, bluish gray lower cabinets, gray counter top, subway tile back splash, and wood floors. It’s been done a billion times (as evidenced by the magnitude of inspiration photos I found), but I just wanted something fairly simple and classic.
First things first, I painted the cabinets. Here’s a picture I took because I was too terrified to actually start. This open paint can is the beginning of this whole odyssey. Can you feel the fear in my hands as I take the picture??
 After about a hundred coats of paint (for reals, like ten coats on the outside of the cabinet doors, 5 coats on the inside, etc.), it was back splash time.
This is how pretty the back splash was before:
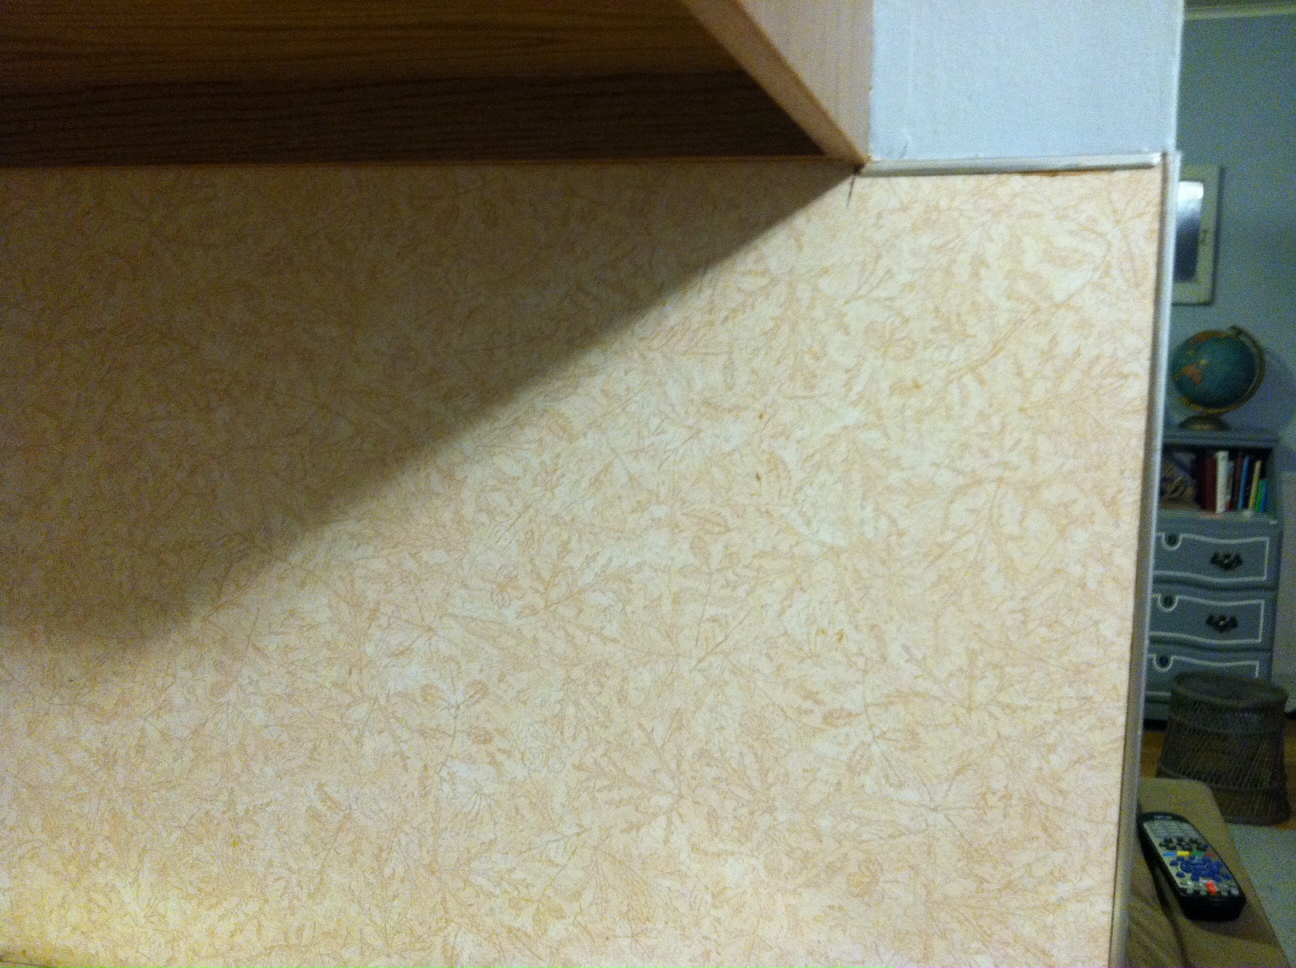 It was like a pinky-tan-ish flesh color with a quaint little leaf pattern. Beautiful. (Oh, and it’s the same material as the counter top.)
And here’s the first back splash panel I put up (again, TERRIFIED!!!):

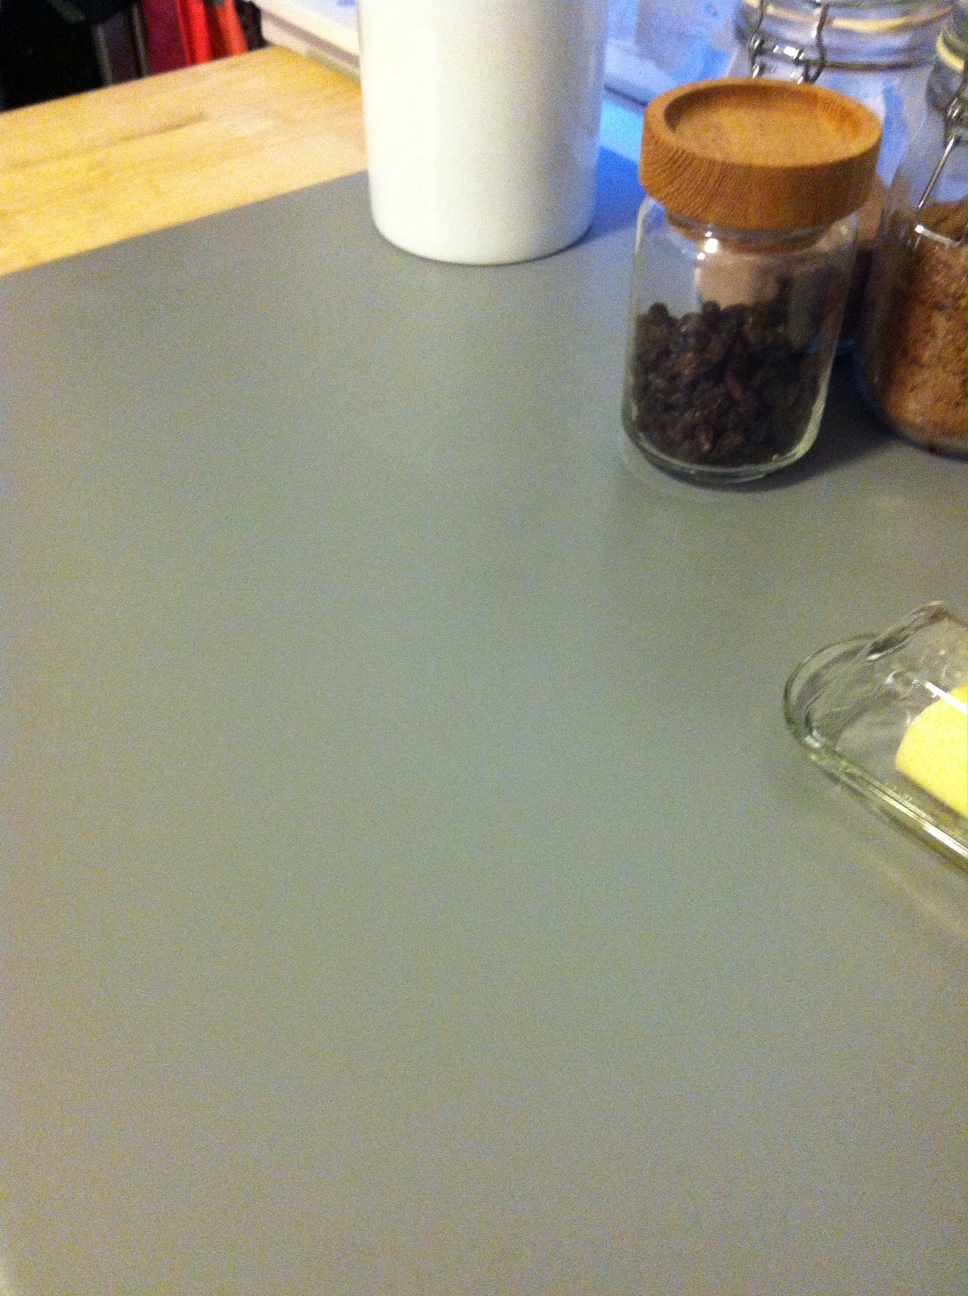
And here’s another “I’m too terrified to get started” photo: Yep, I painted my counter top. Rustoleum counter top coating review below.
Last, I got hardwood installed for the floor. I looked into many options, and hardwood was just the wisest choice. Due to the layout of my house, there is hardwood on either side of the kitchen floor, so matching that wood makes my house look bigger and has a better flow.
 So here’s the big reveal!!!!
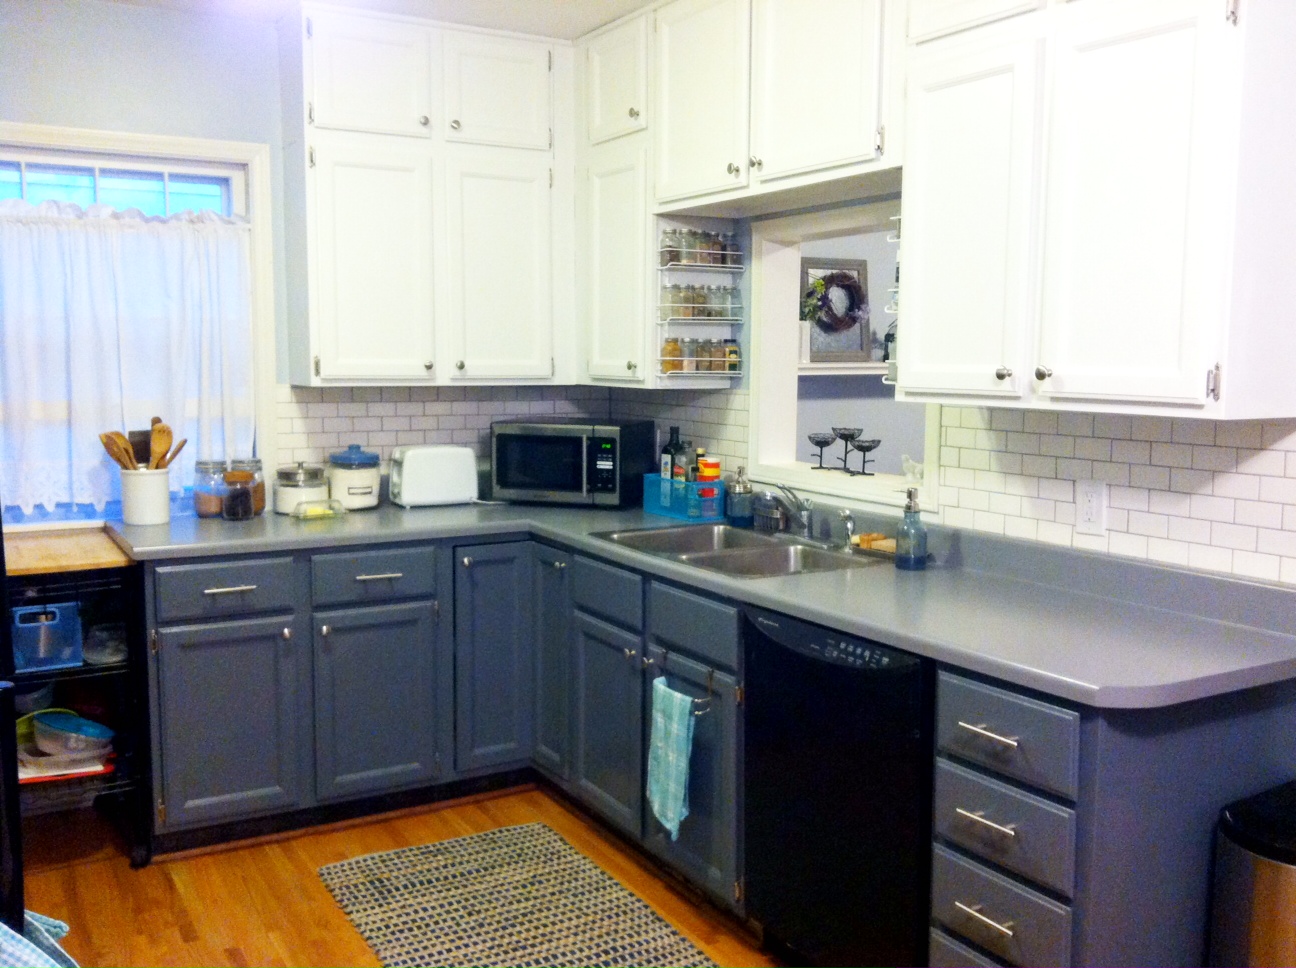

 I’m glad it’s done, and while it was a pain in the ass to do, I’m glad that I did it. I learned a lot, and used tools and materials I’ve never used before (tile cutter, electric sander, wall putty, grout, etc.).

Below are further details on what I did. Stop reading now unless you have some sort of weird obsession with me, or if you’re re-doing your kitchen or something.
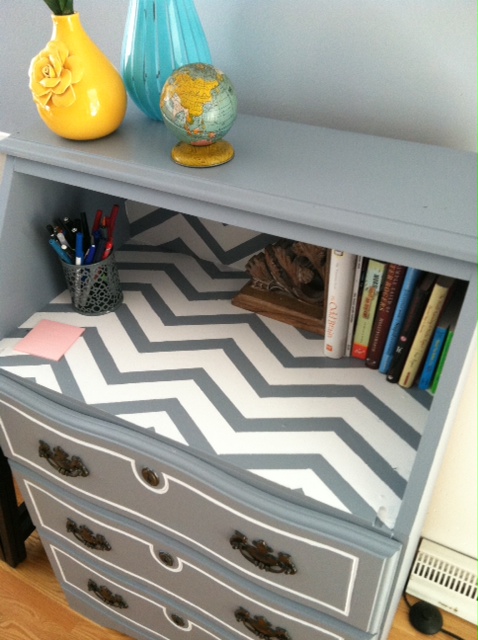
1. I did an Ikea hack!
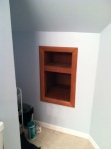
I had heard that you shouldn’t put your oven right up against your fridge because it makes your fridge work harder. So I moved them apart, but then I didn’t want to just have this little gap between them collecting foodstuffs and being difficult to clean. So I decided to use the space for storage. Pshyeah, easier said than done. The space between the appliances was 7 inches ideally, 9 inches at the most (moving the oven over further would have narrowed accessibility to the doorway). Ever tried finding a 7″ wide 37″ tall 24″ long shelf? Good luck! But I found one!!! Kinda. I was wandering around Ikea (after trying many other stores and google searches), coming to the conclusion that of course this doesn’t exist; why would it? And then I saw it and I heard angels singing.

It’s intended to be used over a toilet. It was the perfect size (7 inches wide!!!!), it was just too tall. But I’ve got a saw! And a dad who can help me! So we sawed off some parts and made this:

2. Another Ikea solution. So here’s the thing: I’m short. The cabinets above my oven are too high for me, and there’s really no other place to put pots and pans, so I just kept them on the top of the stove. Which works, but isn’t ideal of course. So I got myself a rack from Ikea, and my dad did a little problem solving (screwing things into my crazy plaster walls kind of doesn’t work, so we had to attach it to the cabinet), and voila!!
 3. Rustoleum Counter Top Coating
Okay, here are my thoughts, in case you’re interested in possibly using this product.
Overall:
It is a good, cheap, relatively easy, temporary solution for an ugly counter top. It is fairly easy to apply, and fairly good at smoothing itself out. I would recommend it, but I would give some advice and some disclaimers. Total project time: 1.5 hours (including prep and clean-up)
Disclaimers:
a) It smells. If you look at any reviews for it, you’ll see this. Yes, it smells. Like nail polish (I actually think it might just BE nail polish). I had all the windows open, fans going, wore a mask, and breathed through my nose when I used it. It stung my eyes a little as I applied it.
b) It is not acrylic paint. It is HARD to clean up when (not if) you get it somewhere you don’t want it. You will have to throw away your tools after you use them because they will be impossible to clean (unless you use some special cleaner maybe..? Nail polish remover…?).
c) It is not perfect, and neither are you. You will have splotches and little areas that aren’t totally smooth. But it’ll be good enough.
d) It scratches easily when it’s new.
Advice:
a) The instructions on the can are okay, but just do this: apply painter’s tape first, then sand your surface (it doesn’t tell you to do this, but do it), wipe it clean, let it dry. This took about 30 minutes.
b) Like I said, open all windows, have fans running, and wear a mask. I’d also recommend wearing gloves (I didn’t. It comes off eventually, but not easily. I used nail polish remover.). Do this project when you can leave the house for a little while afterward. It will smell strongly (I didn’t get a headache or anything, but it’s unpleasant) for a few hours after, and the next couple of days it will just smell like you just painted a room (not too bad), and then by the third day, the smell was completely gone.
c) Have a wet rag/paper towel on hand. When (WHEN) you drip on something, you will want to clean it up immediately. If you wipe it right away, you’ll be fine, just don’t let it dry.
d) Like the instructions say, you’ll use a roller (and a small, soft brush for smaller areas). The actual painting part goes quickly because the stuff dries quickly. So once you’re ready to start, just roll roll roll!! Actual painting time for me (including getting into small, tough areas) was about 30 minutes.
e) The instructions say to let it cure for 3 days. Don’t believe their lies. Let it cure for a week (or longer if possible!). It’s dry to the touch basically the next day, but it’s very delicate. Don’t put anything on it for a week, and then start using it verrry carefully for a while after that, then slowly you can start treating it more normally. The woman at Home Depot said that eventually it should be treated with as much care as a marble counter top (she meant that you need to treat it like….kiiiind of carefully. But uh, lady, I’m painting my counter, you think I know anything about marble..?).