
 I just painted this hutch thingy! Boy do I love Before and Afters. Here’s the before:
 It belonged to my grandparents, and after both of them had passed away, I received a few of their wonderful pieces of furniture. This one had been in my garage for a while, because I wasn’t sure what I wanted to do with it. But I had some left over paint from another project (I’ll show you that project someday soon), so I dragged this out, and got it started!
 It had one of these fantastic drop-down lids, and became a desk. I really like it this way, but I would never use it as a desk, and I didn’t want to keep it closed at all times, so I decided to remove the lid and storage shelf (which was broken, see above pic). I kept them, in case I decide to add them back someday.
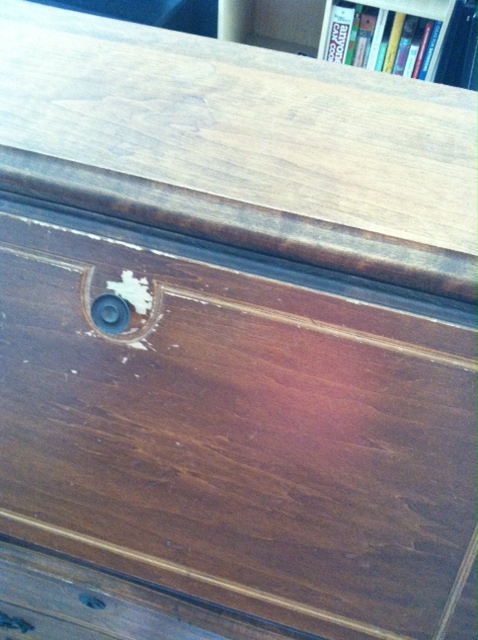 I would have felt pretty bad about painting this if it were in really good condition, but the varnish/lacquer/whateverthiswouldbe needed to be updated anyway. And I don’t like large chunks of brown in my house, so I had to change the color.
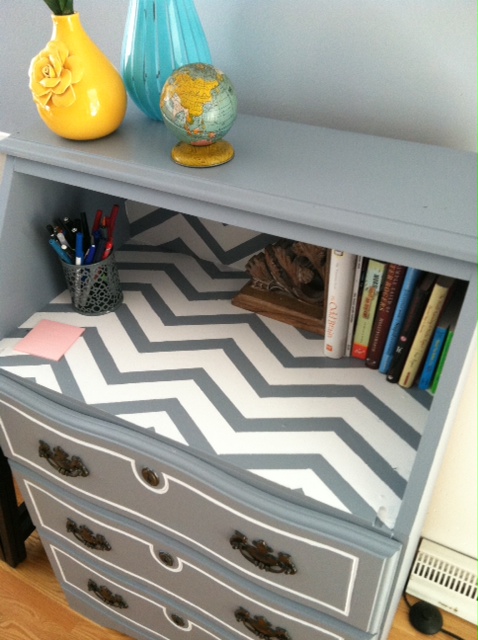
 Ahh chevron. I might have to change the pattern someday when chevron becomes just so “last season” that I can’t even stand to look at it anymore. But for the moment, I really like chevron (trends are trends for a reason, no?…usually). I ended up kind of marking out a grid onto the desk with a pencil and ruler, and then laying the tape down to fit into the grid (to ensure that my stripes weren’t off-kilter or poorly proportioned). Don’t know about you, but I can never get painter’s tape to work properly for me. So after pulling it up, I went back in with a tiny brush and fixed up a bunch of spots.
The white outlines on the drawers were a pain in the neck!! I couldn’t use tape or a ruler or anything since they’re not straight (I was outlining ridges that were already on the drawers), so I just had to freehand it. Which took forEVER. And if you look at them closely in person, you can definitely tell it’s hand-done. But it’s good enough for me.
 Final Thoughts!!
This was my first time painting furniture (I know! What a newbie!!), so it was really fun to figure this stuff out. I haaaaate painting (like painting walls), so I wasn’t necessarily looking forward to this, but it was soo easy and quick!
Just how easy? Here are my steps:
1. Remove hardware, clean item (I just used a wet paper towel and then dried with a cloth).
2. Paint it! I used just some gray paint with primer in it from Home Depot (it was actually exterior paint, because it was from a previous project). I did about two coats. It probably took me about a half an hour (aside from the chevron and outlining on the drawers…that’s a whole other story).
No, I did no sanding. I know! The surface wasn’t super slick or anything, so I didn’t feel it was necessary (and I’m lazy), and it seems to have worked out just fine. Now I’m looking around my house at the million other things that I can paint. PAINT ALL THE THINGS!!!

Wow! This is an amazing makeover! I am so impressed!
LikeLike
Thank you so much! I just checked out your blog, and I love the chairs. Such a cool project! Chairs are also on my list of things to paint, though probably not as many as y’all did 🙂
LikeLike
It looks fantastic. Im really into painting furniture at the moment.
LikeLike
Thanks! Yes, I feel like painting furniture is a rabbit hole, once you start, you get sucked in!
LikeLike
Alex, that is beautiful. Mom would have loved it.
LikeLike
Aww thank you, that means a lot. *sniff sniff* 🙂
LikeLike